How to Use GitHub to Translate WAI Resources
Initial step: Declare your intent
In accordance with the WAI Translations process, please always declare your intent and wait for reply from WAI team before starting a translation.
Create the translation file
-
Near the bottom of each page on the WAI website, there is a "Help improve this page" box.
The middle button is "Fork & Edit in GitHub". That gets you to the GitHub repository.
-
From there, you will be asked to “Fork the repository” – that is, creating a copy of the repository so you can make changes without affecting the original one.

- On the next screen, select all the original file code and copy it to your clipboard (Ctrl+C or ⌘+C).
-
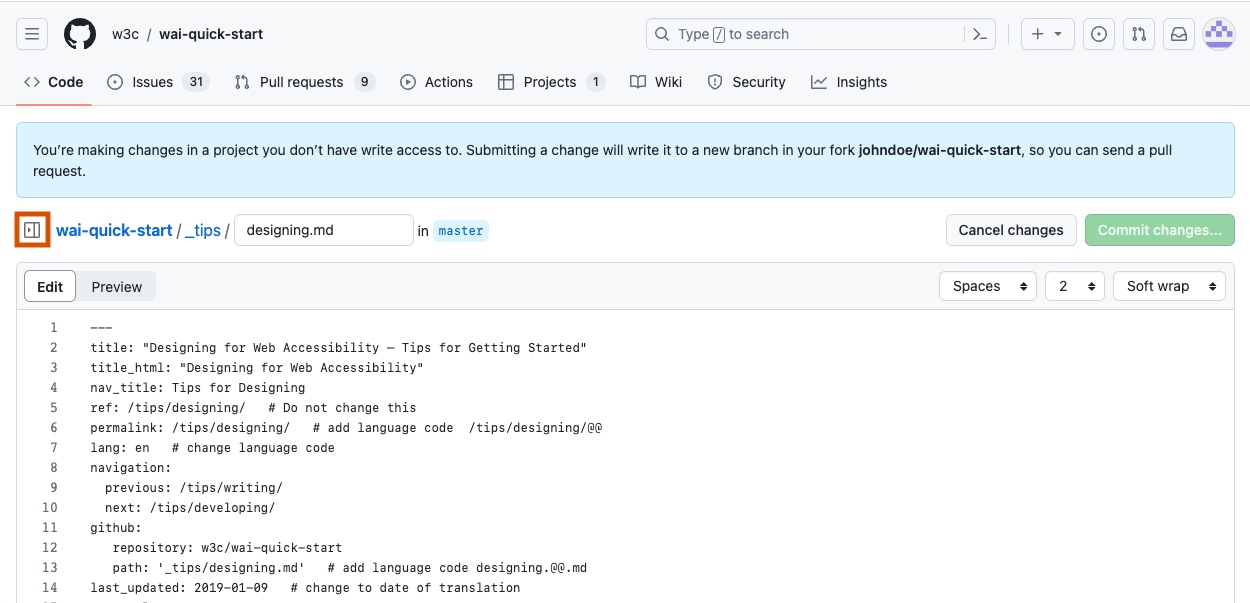
Click on the expand icon, next to the editor breadcrumb, to show the repository file tree.
-
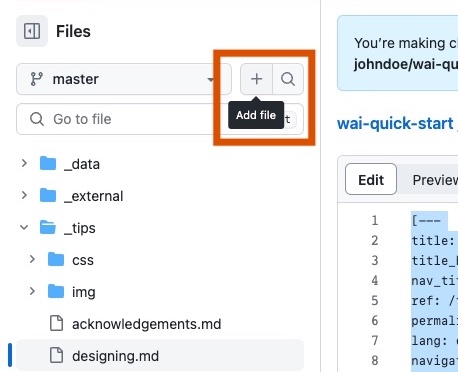
Click on the "+" or "Add file" button to create a new file.
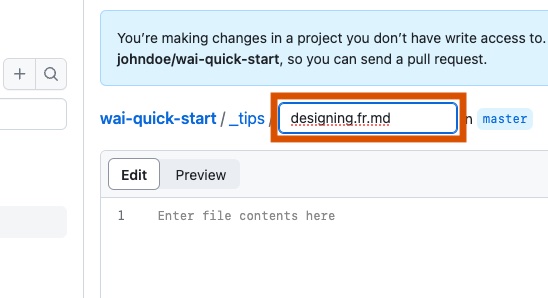
- Name the new file according to instructions on Creating a New Translation page.
-
Paste the original content that you copied in step 2 into the editor (Ctrl+V or ⌘+V).
🎉 Congrats! You have now created the translation file to work with.
Work on your translation
- Edit the content to translate the file, following guidance from Creating a New Translation page.
-
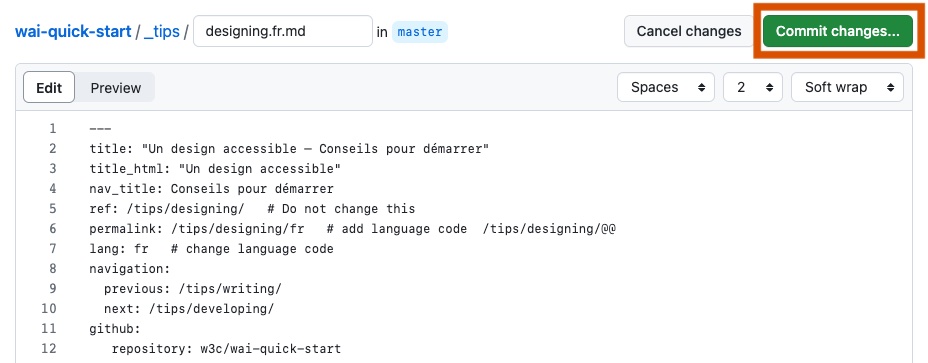
When you are happy with your work, click on "Commit changes..." to save the changes.
-
In the appearing "Propose changes" modal window, you can rename your commit message to better reflect what you have changed. Then, click on "Propose changes".
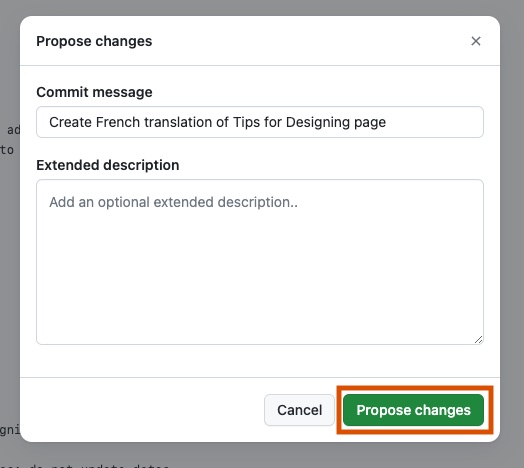
🎉 Congrats! You have now commited your changes!
Prepare your draft Pull Request
-
You are now in the "Comparing changes" view, between the "base" repository (the original W3C repository, beginning with w3c) and the "head" repository (your forked repository, beginning with your username).
Click on "Create pull request", meaning that you propose to apply your changes to the official repository. If the button does not appear, you may need to refresh the page.
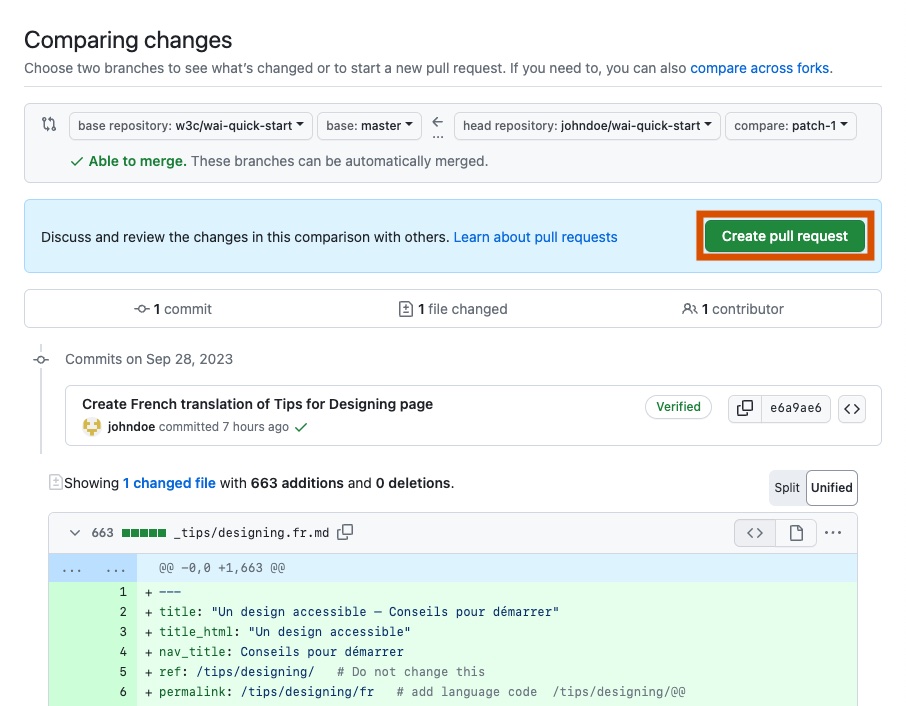
Set the title of the Pull request using the following format: [IN-PROGRESS] Language - Resource Title.
Then, in the "Create pull request" button, select the drop-down arrow and select "Create draft pull request in the drop-down options.
![Screenshot of the “Open a pull request” form in GitHub. The pull request title is “[IN-PROGRESS] French - Tips for Designing”. The drop-down arrow in the “Create pull request” button is selected: the second option “Create draft pull request” is visible.](/content-images/about/translating/create-draft-pull-request.jpg)
Click on the "Draft pull request" button to confirm the submission of the pull request.

🎉 Congrats! Your draft pull request is now created!
Preview your changes
- After you submit the pull request, it will create a preview so you can check your file and make edits. At first, a notification comment will say "👷 Deploy Preview for wai-repo-name processing."
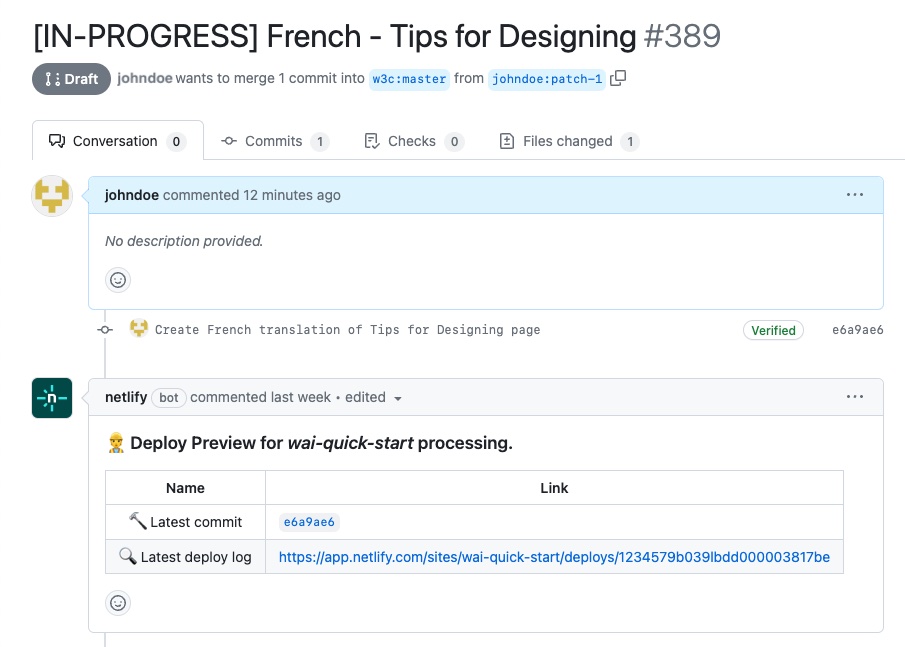
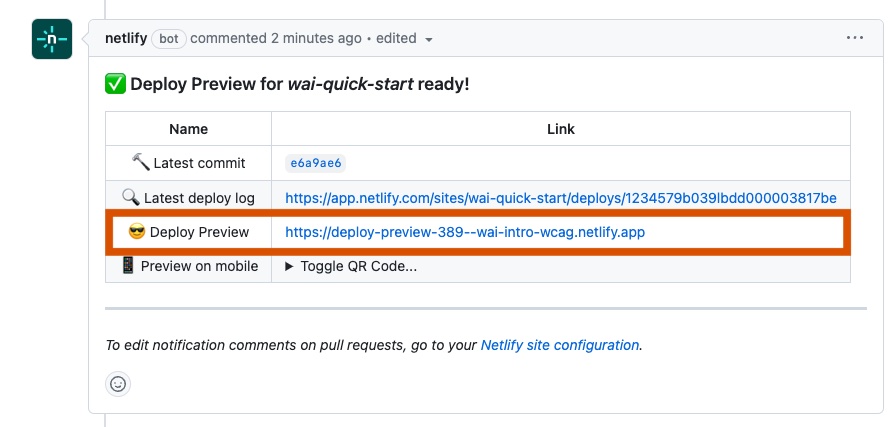
After a few minutes, the notification comment will change to “✅ Deploy Preview for wai-repo-name ready!”.
To see your preview, click on the "Deploy Preview" link.
Mark your Pull request as ready for review
When you have done all your checks and edits, click on the "Edit" button at the top of the Pull request view, to change the title prefix "[IN-PROGRESS]" to "[Ready for Review]"
Then, click on the "Ready for review" button, at the bottom of the Pull request view.

🎉 Congratulations, your pull request is now ready for review!
You can see it is marked as "Open" with a green label at the top of the Pull request view.
![Screenshot of an open pull request in GitHub. The title of the pull request is “[Ready for review] French - Tips for Designing”. A green label “Open” is present below the title.](/content-images/about/translating/ready-for-review-state.jpg)